
Site Migration Runbook for SEO Teams: URL Mapping and Rollbacks
Before you touch a single line of code, snapshot your Google Search Console data, Google Analytics 4 traffic, and Core Web Vitals scores, then build a complete URL mapping spreadsheet with every old URL matched to its new destination. Success means every redirect is live and tested, sitemaps and Change of Address are submitted, and you’re watching indexation and rankings recover on a defined schedule instead of guessing whether something broke.
TL;DR:
- Properly mapping every URL and verifying redirects before launch prevents SEO ranking drops caused by 404 errors, redirect chains, or incorrect canonical tags.
- Conducting thorough pre-migration audits, including baseline metric exports and full site crawling, ensures you have evidence to measure recovery and identify issues early.
- Implementing 301 redirects directly to matching pages and keeping robots.txt open during the transition maintains crawl efficiency and preserves link equity.
- Monitoring key SEO metrics hourly during launch and gradually transitioning to weekly checks over three months helps catch and fix indexing, ranking, and crawl issues promptly.
- Enlisting experienced migration support reduces the risk of costly mistakes, especially during large or complex projects involving domain changes, CMS switches, or international sites.
Table of Contents
- What Counts as a Site Migration SEO Checklist Scenario?
- Does Migrating a Site Always Hurt SEO Rankings?
- Pre-Migration Checklist: Audit, Baseline, and the URL Mapping Spreadsheet
- Staging QA Checklist: What to Test Before You Ever Flip the Switch
- Redirects and Canonicalization: The Rules That Actually Preserve Rankings
- Launch Day Cutover: The Exact Sequence to Follow
- Post-Launch Monitoring: What to Watch From Day 0 to Day 90
- Tools and Templates to Copy Into Your Runbook
- What Fifteen Years of Migrations Actually Teach You
- International SEO Beyond Hreflang: What Migrations Can Break
- Content Audit and Optimization Before You Move Anything
- SEO Testing Methods After Launch: Crawl Budget and Indexation Checks
- Why Most Migration Failures Are Planning Failures, Not Technical Ones
- Get Migration Support From a Team That’s Done This Before
- Sources
- FAQ
What Counts as a Site Migration SEO Checklist Scenario?
A site migration is any change that alters how search engines find, crawl, or evaluate your URLs. That’s a broader definition than most people assume. Moving to a new domain is the obvious case, but plenty of quieter changes trigger the same risks.
Here are the migration types that demand a full site migration SEO checklist, not just a quick spot check:
- Domain change: Moving from one root domain to another (acquisitions, rebrands, ccTLD consolidation)
- URL structure change: Restructuring folders, slugs, or parameters even on the same domain
- Protocol change: Shifting from HTTP to HTTPS, or www to non-www
- CMS migration: Switching platforms (WordPress to a headless CMS, for example) even if URLs stay identical
- Hosting or CDN change: Moving servers without touching URLs, which still carries crawl and uptime risk
- Content pruning or consolidation: Merging or removing large numbers of pages during a redesign
Each of these can shift how Google interprets your site’s structure, even when nothing looks different to a human visitor. A CMS switch that changes how canonical tags render, for instance, can quietly break signals that took years to build.
Whatever the trigger, one rule holds across every scenario: your baseline data is the single most valuable asset in the entire migration. Without it, you have no way to prove recovery or diagnose what went wrong.
Does Migrating a Site Always Hurt SEO Rankings?
Some ranking volatility during a migration is normal and expected. Most well-executed migrations see traffic dip for a period before stabilizing, often within a few weeks to a couple of months, as Google recrawls and reindexes the new URLs. That’s not a sign of failure. It’s Google catching up.
A migration doesn’t have to cost you rankings if the redirect mapping is complete and verified before launch. The failures that cause lasting damage are almost always self-inflicted:
- Missing 301 redirects that leave old URLs returning 404s
- Redirecting everything to the homepage instead of the matching new page
- Canonical tags pointing to the wrong URL or left unchanged after launch
- Redirect chains (URL A to B to C) that dilute signal and slow crawlers
- Blocking the new site from indexing and forgetting to remove it
- Filing Change of Address before redirects are actually live
The Moz website migration guide frames a well-run migration as a phased process: baseline, crawl and inventory, mapping, QA, cutover, then a 30 to 90 day monitoring window. Wobble that fits inside that curve is normal. A sudden cliff in indexed pages, or a specific template losing all its rankings overnight, is not. That’s the line between “give it time” and “check the redirect logs right now.”
Pre-Migration Checklist: Audit, Baseline, and the URL Mapping Spreadsheet
This is where migrations succeed or fail. Joost de Valk’s often-cited framing is that SEO domain migrations are 90% preparation and 10% execution. Everything below happens before launch day, and skipping any step here is what turns a routine migration into a recovery project.
1. Export every baseline metric with a date stamp. Pull Google Search Console performance data (clicks, impressions, average position by page), GA4 traffic by landing page, current keyword rankings from your rank tracker, and Core Web Vitals field data. Label every export with the date. You’ll need these numbers later to prove whether the migration worked or to pinpoint exactly what regressed.
2. Crawl the entire site and export every URL. Use a crawler to capture every indexable URL, its status code, title, and canonical tag. Pull server logs for the past 90 days to see which URLs Googlebot actually visits, not just which ones exist. List every subdomain, including staging environments, blog subdomains, and regional sites that might get missed in the main inventory.
3. Build the URL mapping spreadsheet. This is the backbone of the entire project. At minimum, include columns for: old URL, current status, new URL, action (redirect, merge, remove), current organic traffic, referring backlinks, assigned owner, and notes. Every single indexed URL needs a row. No exceptions, no “we’ll figure it out later.”
4. Lower your DNS TTL in advance and prepare Search Console. Drop your DNS time-to-live setting days ahead of cutover so the switch propagates faster when it counts. Verify the new domain or subdomain in Search Console before launch, and choose DNS verification over an HTML file or meta tag. According to Joost de Valk’s migration guidance, DNS TXT records persist through a migration in a way that file-based verification methods often don’t, since the file itself can get lost in the platform switch.
5. Draft rollback thresholds and assign owners now. Decide, in writing, what conditions trigger a rollback (a specific traffic drop, a spike in 404s, a broken checkout flow) before you’re standing in the middle of a launch-day fire. Name who owns DNS, who owns redirects, who owns Search Console, and who has final authority to call a rollback. Moz’s migration guide treats this runbook, with explicit go/no-go criteria, as a mandatory part of any serious migration plan, not an optional nicety.
Pro Tip: Add a “confidence level” column to your URL mapping sheet, rating each redirect as automated pattern match, manually verified, or uncertain. On launch day, spot check the “uncertain” rows first. That’s where the actual bugs live.
Set a communication cadence alongside the technical work. Stakeholders (leadership, customer support, paid media managers) need to know the launch date, expected traffic dips, and who to contact if something looks wrong. Customer-facing teams fielding “why does this link not work” tickets should know that’s expected and temporary, not a five-alarm outage.
Staging QA Checklist: What to Test Before You Ever Flip the Switch
Two rules govern staging environments, and violating either one causes real damage. First, staging must stay blocked from indexing the entire time, through robots.txt disallow rules and a noindex tag as a backup. Second, your production robots.txt and sitemap need to be prepared and ready to swap the moment you go live, rather than written the day of.
Before cutover, work through this validation list:
- Confirm every canonical tag on the new site points to the correct, final URL, not a staging address or an old pattern
- Check hreflang tags resolve correctly if you run multiple language or regional versions
- Validate structured data (schema markup) renders without errors using Google’s Rich Results Test
- Compare meta titles and descriptions against your pre-migration inventory to catch template errors
- Click through internal navigation and confirm links point to new URLs, not redirected old ones
- Run page speed and Core Web Vitals tests on the new environment under realistic conditions
- Submit test transactions through every form, checkout flow, and lead capture point
- Confirm your Search Console verification method will survive the swap (DNS verification, again, is the safer bet)
Don’t rely on manual spot checks alone for large sites. Write automated scripts that crawl a sample of staging URLs and compare their expected redirect targets, status codes, and canonical tags against your mapping spreadsheet. Moz’s guidance on large-scale migrations makes the case plainly: pattern-based redirects need sampling tests across a representative set of real URLs, because a rule that works for ten example URLs can silently fail for the other ten thousand.
Pro Tip: Run your automated redirect checker against a random sample of 200 to 500 URLs pulled from your server logs, not just your sitemap. Log files show what’s actually getting crawled, including old URLs your sitemap forgot about.
Redirects and Canonicalization: The Rules That Actually Preserve Rankings
Server-side 301 redirects are the standard for permanent URL changes, and Google’s own guidance on 301 redirects confirms they’re the preferred signal for telling search engines a move is permanent. Implement them at the server or edge layer rather than through client-side JavaScript or meta refresh tags, both of which crawl more slowly and pass weaker signal.
A few rules separate a clean migration from a messy one:
- Every mapped URL gets a direct 301 to its single best-matching new URL, never a blanket redirect to the homepage
- Eliminate redirect chains entirely; A to B to C should become a direct A to C
- Keep redirects at the CDN or edge layer when possible for faster response times during heavy crawl activity
- New pages must self-reference with rel=“canonical,” and your sitemap should contain only final canonical URLs
That last point matters more than most teams realize. Google’s own documentation on moving a site with URL changes is explicit: don’t include old URLs in the new sitemap, and submit the clean, canonical-only version immediately at launch.
One rule trips up almost every team running its first migration: never redirect the old domain’s robots.txt file. Leave it empty or allow-all so crawlers can still access and follow the redirects living on the old domain. A redirected robots.txt can suppress Googlebot’s ability to discover the very redirects you need it to see.
| Redirect element | Correct approach | Common mistake |
|---|---|---|
| URL-to-URL mapping | Direct 301 to best-matching page | Blanket redirect to homepage |
| Redirect chains | Single hop, A to C | Multi-hop A to B to C |
| Old robots.txt | Left empty or allow-all | Redirected to new domain’s robots.txt |
| New sitemap contents | Only final canonical URLs | Includes stale or old-domain URLs |
| Change of Address timing | Filed after redirects are live | Filed before redirects are tested |
Wait to file the Change of Address tool in Search Console until redirects are confirmed live and both properties are verified. Google’s Change of Address support documentation recommends maintaining redirects for at least 180 days after that, giving Google enough time to fully process the move and giving you a safety net if issues surface late.
Launch Day Cutover: The Exact Sequence to Follow
Launch during your lowest-traffic window, with every owner from your pre-migration runbook on call, not just reachable by phone. This isn’t a moment to run lean.
The cutover sequence, in order:
- Execute the DNS or build swap. Push the new site live at the domain or path where it will permanently live.
- Activate redirect rules. Confirm the redirect layer (server or edge) is live and serving 301s for the full mapped URL set.
- Swap robots.txt on the new production site. Make sure it’s not accidentally still blocking crawlers with a leftover staging disallow rule.
- Submit the new sitemap through Search Console, containing only canonical, final URLs.
- File Change of Address in Search Console, but only once redirects are confirmed live and both old and new properties are verified.
Within the first hour, run immediate verification: crawl your top 100 URLs by traffic and confirm each returns the correct status code. Spot-check a random sample of redirects manually, not just through the crawler. Check Search Console’s Coverage report for anomalies, and watch GA4 real-time traffic to confirm sessions are flowing to the new URLs correctly.
Set explicit rollback thresholds before launch, not during the panic. Rolling back means reverting DNS or the redirect layer to the previous state while your team fixes the underlying issue, then attempting cutover again once it’s resolved.

Pro Tip: Add a custom Redirect-By response header (naming which rule or layer served each redirect) before launch. When something breaks at 2 a.m., that header tells you in seconds whether the problem is at the CDN, the server, or the application layer, instead of forcing a blind debugging session.
Post-Launch Monitoring: What to Watch From Day 0 to Day 90
Monitoring cadence should shrink as time passes and confidence grows. Check hourly on day zero and day one. Move to daily checks through the first week. Drop to weekly checks for weeks two through four. Then re-baseline fully at the 30, 60, and 90 day marks, comparing against your original pre-migration exports.
Track these metrics at every checkpoint:
- Total indexed page count in Search Console, compared against your pre-migration baseline
- Organic sessions broken down by page template, not just site-wide totals
- Rankings for your top keywords by template or page type
- Core Web Vitals field data (not just lab data) for the new environment
When you spot a page that’s dropped out of the index or lost rankings, use the URL Inspection tool in Search Console to check its indexing status and request reindexing if needed. If a whole template or section is affected rather than isolated pages, that usually points to a systemic issue like a broken canonical pattern or a robots.txt rule, not a one-off content problem. That’s the moment to loop in developers rather than trying to fix it through Search Console alone.
Traffic that’s still meaningfully below baseline at the 60 or 90 day mark, with no clear technical cause, deserves a full second-pass crawl audit. Something in the original mapping likely got missed.
Tools and Templates to Copy Into Your Runbook
You don’t need exotic software for this. You need the right categories covered: a crawler (for full-site inventories), a log file analyzer (for real crawl behavior), DNS management access, an edge or CDN redirect layer, and Search Console plus a rank tracker for monitoring.
Your URL mapping template needs, at minimum: old URL, new URL, status, action, current traffic, backlink count, owner, and notes. Your launch runbook should list the cutover sequence, named owners per step, rollback thresholds, and emergency contacts, formatted so anyone on the team can execute it without you in the room.
Store both documents in version control or a shared drive with dated snapshots, not just a single live spreadsheet that gets overwritten. When you’re auditing what happened three months later, you want to see exactly what the plan said on launch day, not what it evolved into afterward.
What Fifteen Years of Migrations Actually Teach You
Delay is almost always cheaper than a rushed launch. An incomplete redirect map or an untested script costs you far less time to fix before cutover than after, when you’re also fielding stakeholder panic. The non-obvious rules matter most: leave the old robots.txt untouched and allow-all, and add a Redirect-By header so debugging during a live incident takes minutes instead of hours.
Complex migrations, especially ones involving domain changes, CMS platform switches, or large content consolidations, benefit from bringing in outside technical expertise rather than stretching one internal generalist across project management, engineering, and SEO. That’s the gap where professional SEO services close the distance between “we think it’s fine” and “we’ve verified it’s fine.”
International SEO Beyond Hreflang: What Migrations Can Break
Hreflang tags get most of the attention in international SEO conversations, but a migration touches far more than that one tag. If your site serves multiple countries or languages, check that country-specific Search Console properties (separate domains, subdomains, or subfolders) are all re-verified individually after the move, not just your primary property.
Geo-targeting settings inside Search Console, where applicable, need to be reconfirmed for each regional section. Currency and pricing display logic tied to specific URL patterns can silently break if your new URL structure handles locale detection differently than the old one did. Local business schema markup, tied to Google Business Profile listings in multiple regions, needs the same validation pass as your primary structured data.
Regional CDNs or edge caching rules sometimes serve different redirect behavior by geography, especially if your old infrastructure had region-specific routing that the new setup doesn’t replicate. Test redirects from multiple geographic locations, not just from your office network, to catch these gaps before launch.
If your international structure relies on ccTLDs (separate domains per country) rather than subfolders, treat each ccTLD as its own migration project with its own baseline, mapping, and Search Console verification. Bundling five country domains into one migration timeline, without five separate mapping efforts, is a common way international rankings quietly collapse after a global relaunch.
Content Audit and Optimization Before You Move Anything
A migration is the natural checkpoint to decide what content deserves to survive the move at all. Before building your URL mapping spreadsheet, run a content audit that scores every page on organic traffic, backlinks, conversion contribution, and freshness.
Pages with meaningful traffic or backlinks get a direct one-to-one redirect to an equivalent or improved page. Thin, outdated, or duplicate pages are candidates for consolidation, where two or three overlapping pages merge into one stronger page that absorbs the combined value through redirects. Pages with genuinely no traffic, no backlinks, and no strategic value can be retired with a redirect to the most relevant parent category, or in some cases, allowed to return a proper 404 or 410 if there’s truly nothing worth preserving.
This is also the moment to fix long-standing content problems you’ve been putting off: outdated statistics, broken internal links, thin category pages, or keyword cannibalization between near-duplicate pages. Rewriting content during a migration means you’re testing two variables (the move and the content change) at once, which complicates your post-launch diagnosis if rankings shift. The safer approach is migrating content as-is first, confirming stability, then optimizing afterward with a clean before-and-after comparison.
Skipping the audit and redirecting everything one-to-one regardless of quality just carries your old problems into your new infrastructure with a fresh coat of paint.
SEO Testing Methods After Launch: Crawl Budget and Indexation Checks
Two technical concepts deserve specific testing attention after launch: crawl budget and indexation health. Crawl budget refers to how many pages Googlebot is willing and able to crawl on your site within a given timeframe, and a migration can quietly waste that budget on redirect chains, duplicate content, or orphaned URLs.
Pull server log data for the first two weeks post-launch and check which URLs Googlebot is actually requesting. If it’s spending significant crawl activity on old URLs still returning redirects rather than moving on to fully index new pages, that’s a signal your redirect chains or internal linking are inefficient. Compare crawl frequency to your pre-migration logs; a sharp drop in overall crawl activity can indicate Google is deprioritizing the site due to errors or slow response times.
For indexation checks, compare your indexed page count in Search Console against your full URL inventory from the pre-migration crawl. A gap between “pages that should be indexed” and “pages Google has actually indexed” points to either a technical blocker (a stray noindex tag, a robots.txt rule) or a quality signal issue Google is using to deprioritize certain pages.
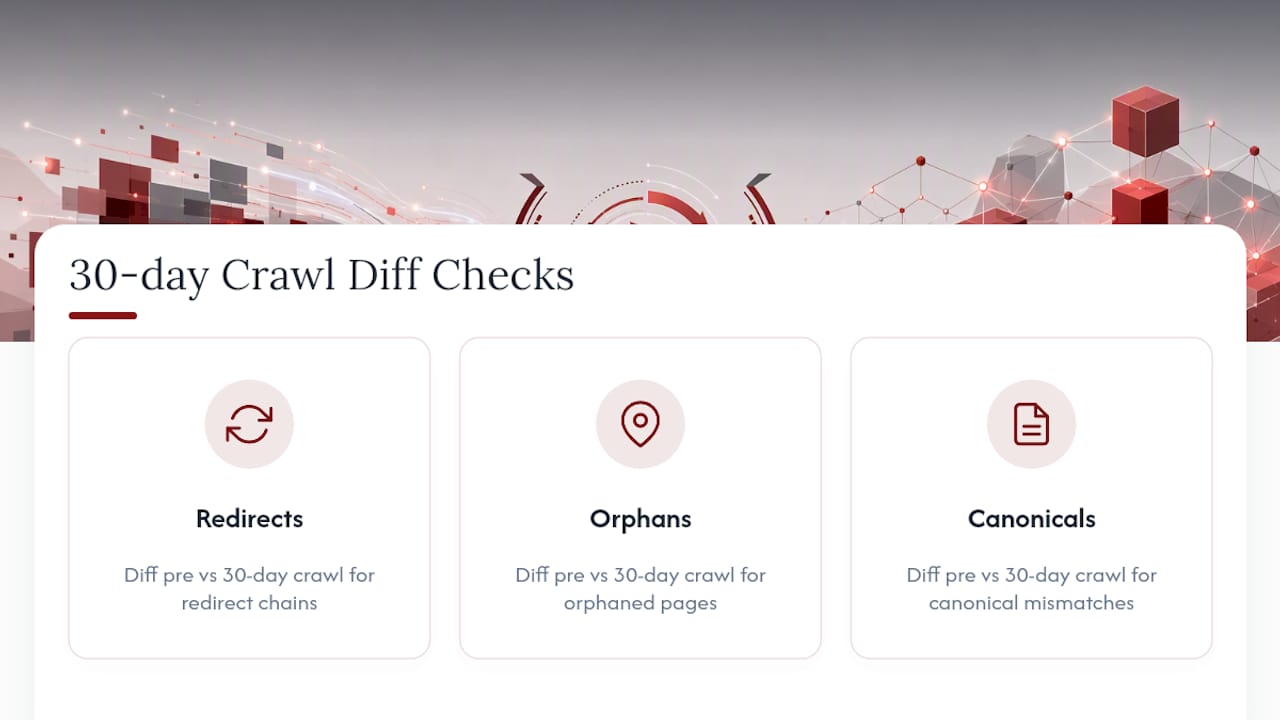
Run a fresh full-site crawl at the 30-day mark and diff it against your pre-launch crawl export. Look specifically for unexpected redirect chains, orphaned pages with no internal links pointing to them, and canonical tags that don’t match the URL serving the page. These three issues account for the majority of lingering post-migration ranking problems that don’t resolve on their own with time.
Why Most Migration Failures Are Planning Failures, Not Technical Ones
The technical mechanics of a migration, redirects, canonicals, sitemaps, aren’t complicated. What actually separates a clean migration from a six-month recovery project is discipline in the boring parts: the baseline exports nobody wants to spend a day building, the URL mapping spreadsheet that gets rushed to hit a launch date, and the rollback thresholds that only get written after something’s already gone wrong.
The conventional advice on this topic focuses heavily on the technical checklist and treats project management as an afterthought. That’s backwards. Migrations fail more often from missing ownership and rushed timelines than from anyone misunderstanding what a 301 redirect does. If you take one thing from this checklist, prioritize the baseline data and the mapping spreadsheet above everything else. Every other step depends on those two artifacts being complete and accurate.
Treat a migration as a cross-discipline project, not a technical SEO task with an audience of one. Bring in engineering, project management, and SEO expertise together rather than expecting a single person to cover all three roles under a launch deadline.
— Will
Get Migration Support From a Team That’s Done This Before
Reading a checklist and executing a zero-loss migration under a hard deadline are two different skill levels. Migration work is an integral part of how a website rebuild or platform switch is planned from day one.

A typical migration engagement covers the pieces this checklist walks through: baseline audits, URL mapping, staging QA, redirect implementation, launch-day cutover support, and post-launch monitoring through the stabilization window. If you’re planning a domain change, a CMS switch, or a full redesign and want a second set of eyes checking the redirect map before you flip the switch, Dotxero’s website development team can scope the project and walk through what a migration engagement would look like for your specific site. Ongoing SEO management after launch covers the monitoring cadence and reindexing triage this checklist recommends, without you having to build the tracking system yourself. Reach out for a quote and describe your current setup, and you’ll get a straight answer on scope and timeline before you commit to anything.
Sources
- Change of address – Google Search Central Help
- SEO domain migrations — Joost de Valk
- Website migration guide – Moz
FAQ
How Do You Do an SEO Migration Without Losing Rankings?
Start by exporting baseline data from Search Console, GA4, and your rank tracker, then build a complete URL mapping spreadsheet before writing any code. Implement server-side 301 redirects for every mapped URL, validate them on staging, and monitor daily for the first two weeks after launch using the phased approach outlined in Moz’s migration guide.
Does Migrating a Website Always Affect SEO Rankings?
Some short-term traffic volatility is normal as Google recrawls and reindexes your new URLs, typically stabilizing within a few weeks to a couple of months. Permanent ranking loss usually traces back to specific mistakes, like missing redirects or broken canonical tags, rather than the migration itself.
What Should Be on a Post-Migration Checklist?
A post-migration checklist includes hourly checks on launch day, daily checks through week one, weekly checks through week four, and full re-baselining at 30, 60, and 90 days. Track indexed page count, organic sessions by template, keyword rankings, and Core Web Vitals against your pre-migration export at each interval.
Will a Domain Migration Increase My SEO Traffic?
A domain migration on its own doesn’t inherently increase traffic. It’s designed to preserve the rankings and traffic you already have; any growth afterward typically comes from separate improvements like better site structure, faster page speed, or content optimization made during the rebuild.
When Should I File the Change of Address Tool in Search Console?
File it only after your redirects are live and verified working, and after both the old and new properties are verified in Search Console. Google’s Change of Address guidance recommends keeping redirects active for at least 180 days afterward while it processes the move.